Rimu & Rain

Simple living in the bush

  • Installing a bush bath: Our $50 find

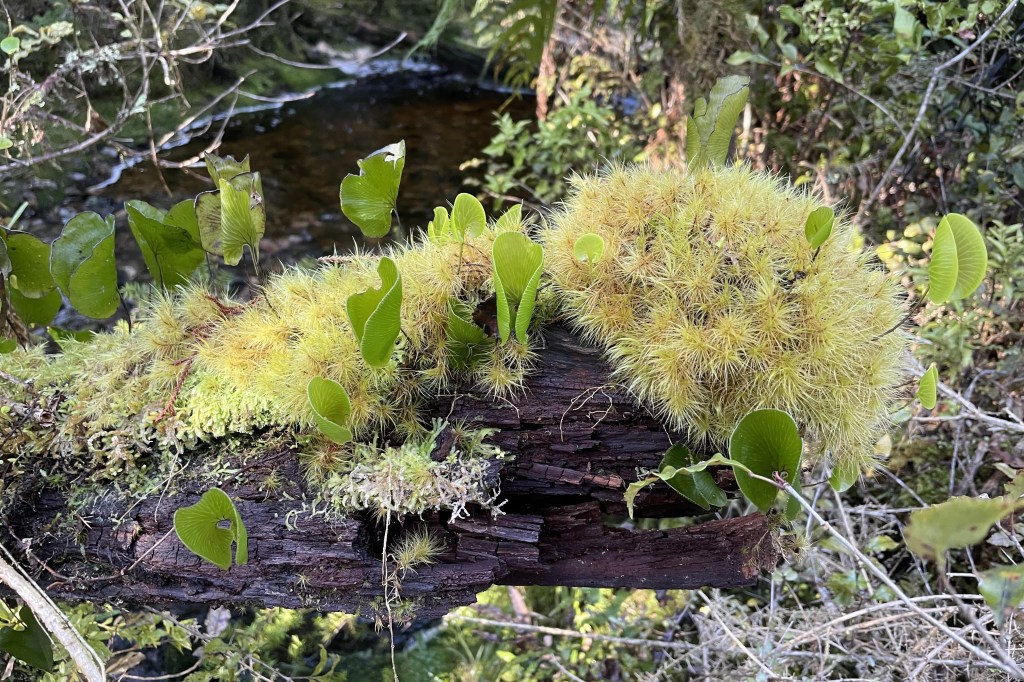
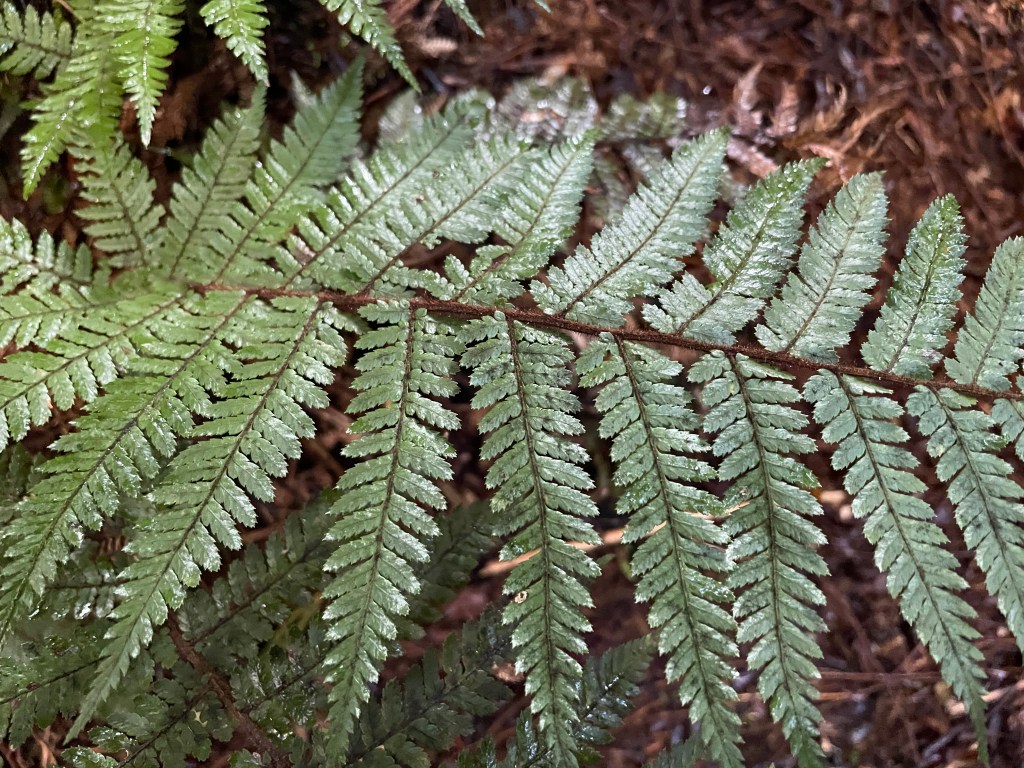
    There’s a certain kind of grime that accumulates after a day working in the West Coast bush. It’s a mix of peaty earth, sweat, bush debris and insect repellant. A quick splash from a bucket to freshen up for happy hour at the end of the day just doesn’t cut it. In the absence of a shower we wanted total immersion, a way to literally wash the day away before relaxing beside the fire with a cold beer or glass of wine.

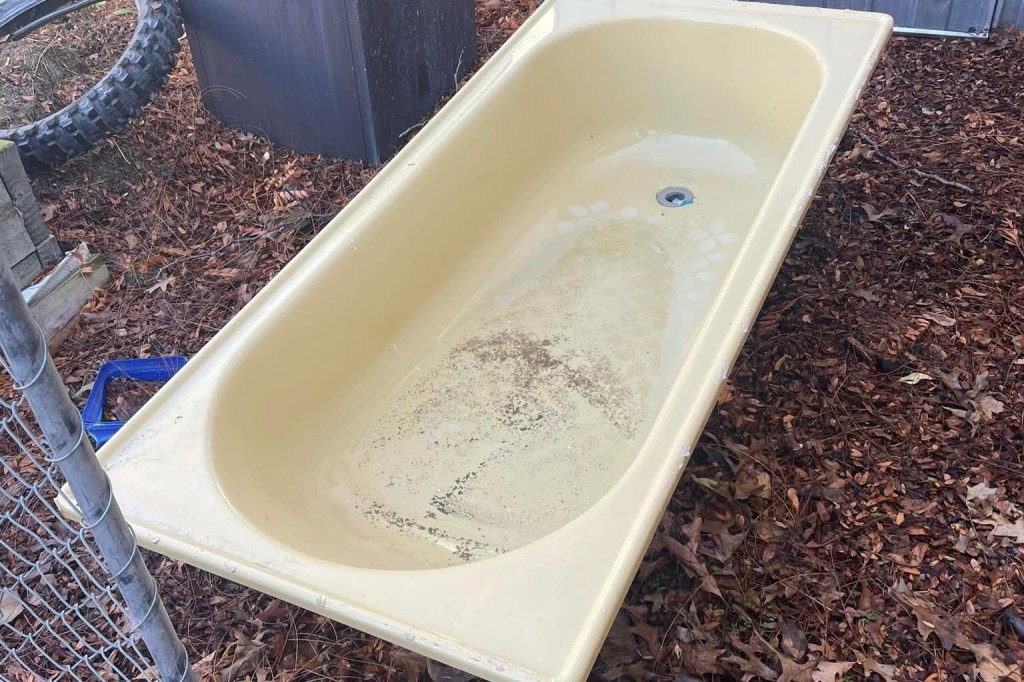
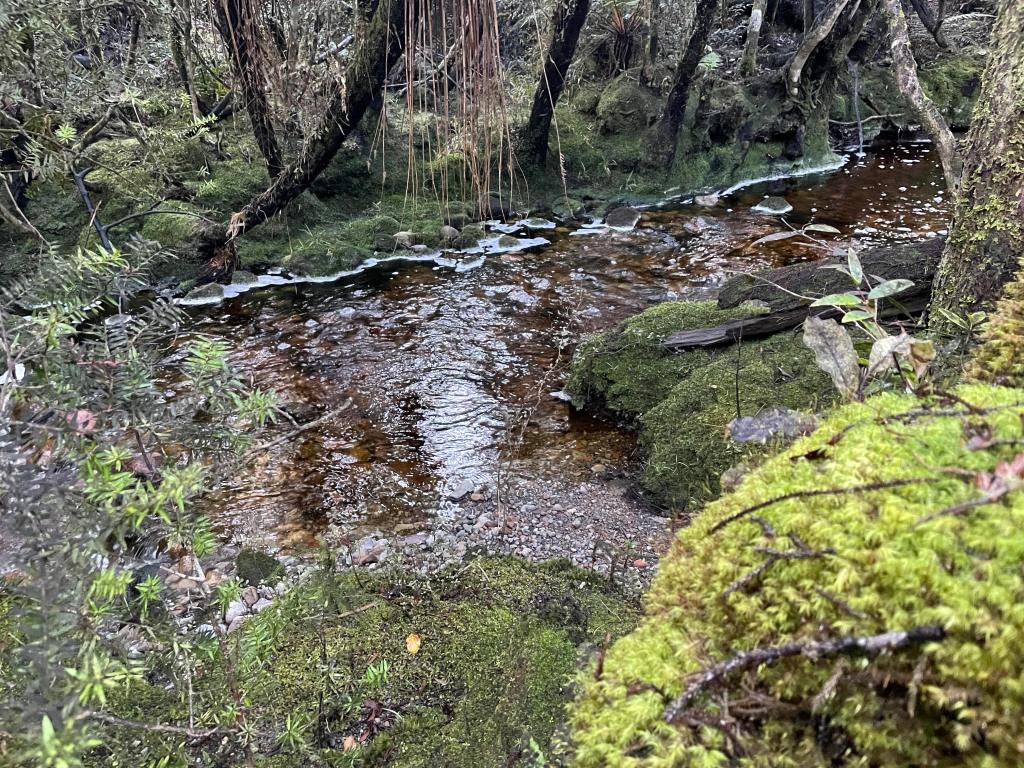
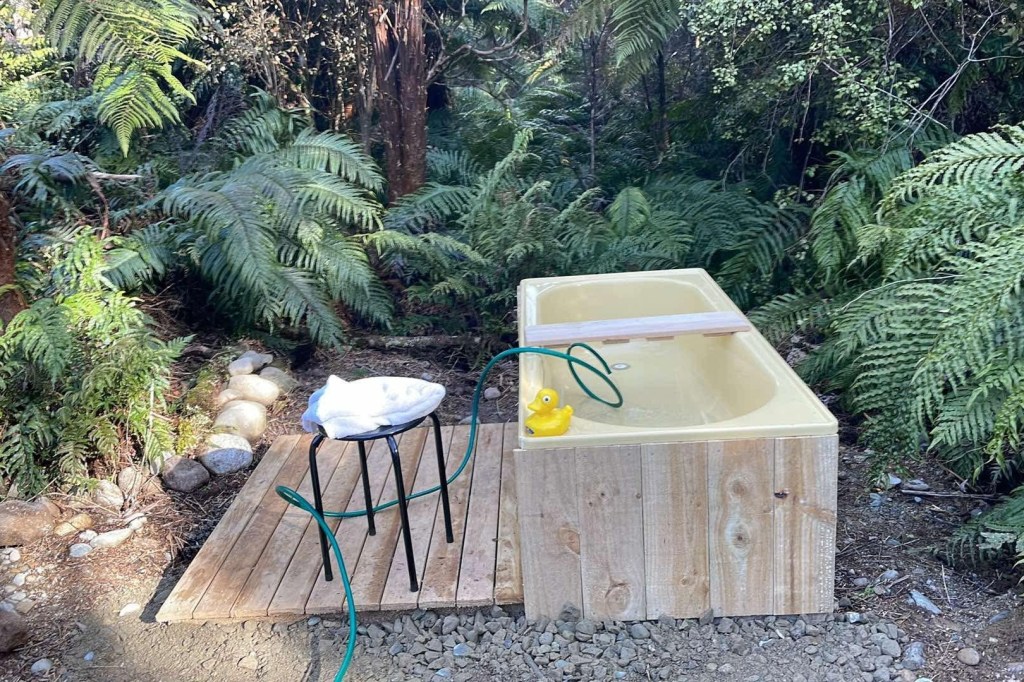
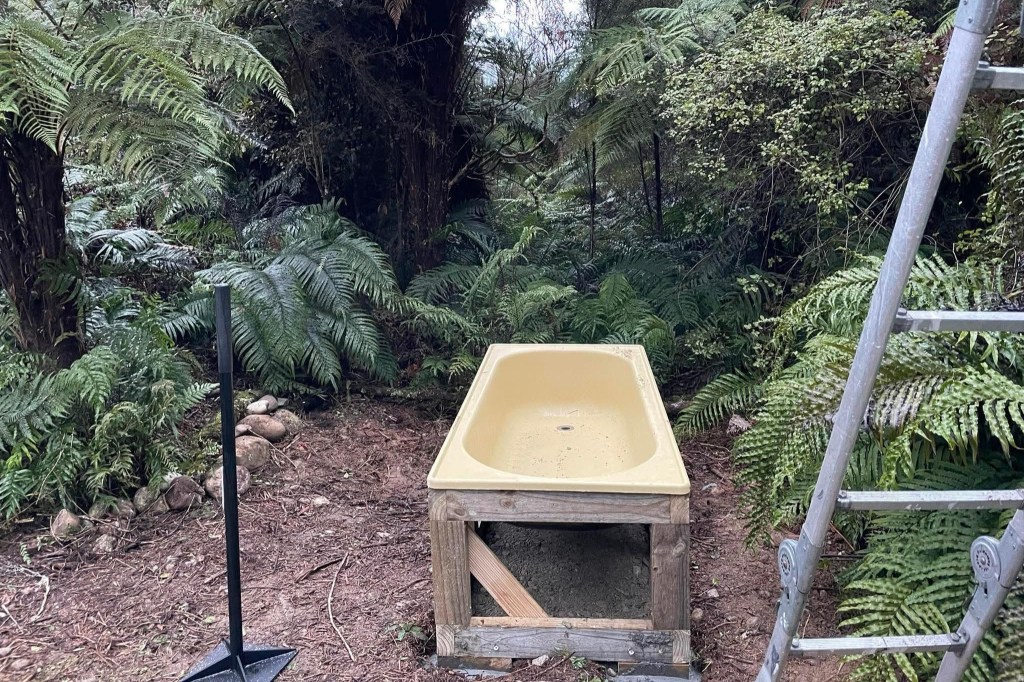
    We were lucky enough to find this 1980s steel bath at our local salvage yard and bought it cheap for just $50. After some debate we decided it is a calming shade of cheesy lemon which blends in well and pulls together the earthy brown and leafy green tones of the surrounding environment. The bath cleaned up well and fortunately there were only a couple of blemishes in the enamel. We chose to sit it behind the Shut on the edge of the clearing. An out of the way spot that looked towards the bush, the lush foliage of ferns in the foreground and towering Rimu trees overhead.

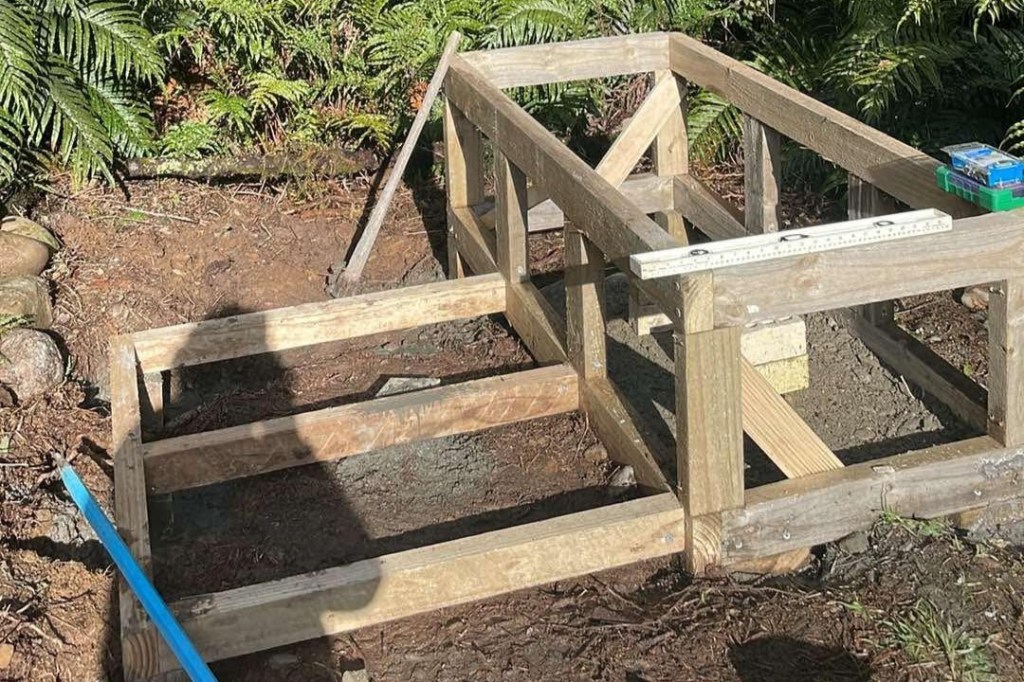
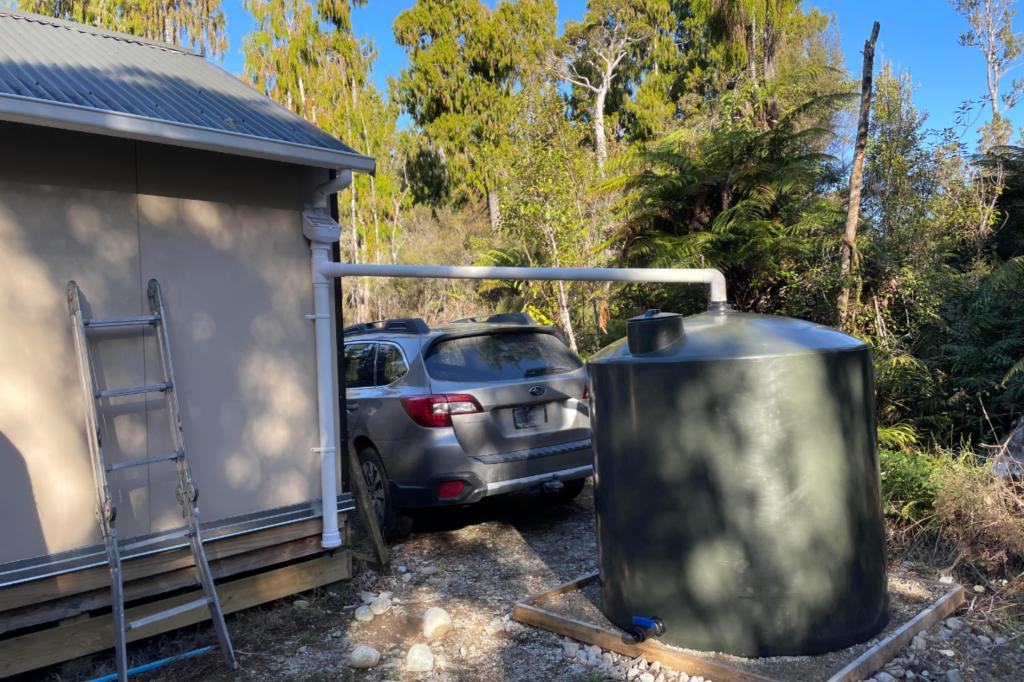
    Mike built a frame for the bath which he constructed in the garage at home and then transported to the land in kitset form to be assembled. He also added a little deck to the side for easy access. The foundation piles were concreted in and we left space under the bath to sit a cast iron two element gas cooker to heat the water. This was a trick we picked up from our neighbour and it would have to make do until we had a more sophisticated hot water set up.

    The land slopes down at this site into a swampy area of bush perfect for draining the bath water away. Mike attached a length of pipe to direct the water into the swampy area and we are careful to use biodegradable soap and shampoo to ensure the ecosystem isn’t impacted.

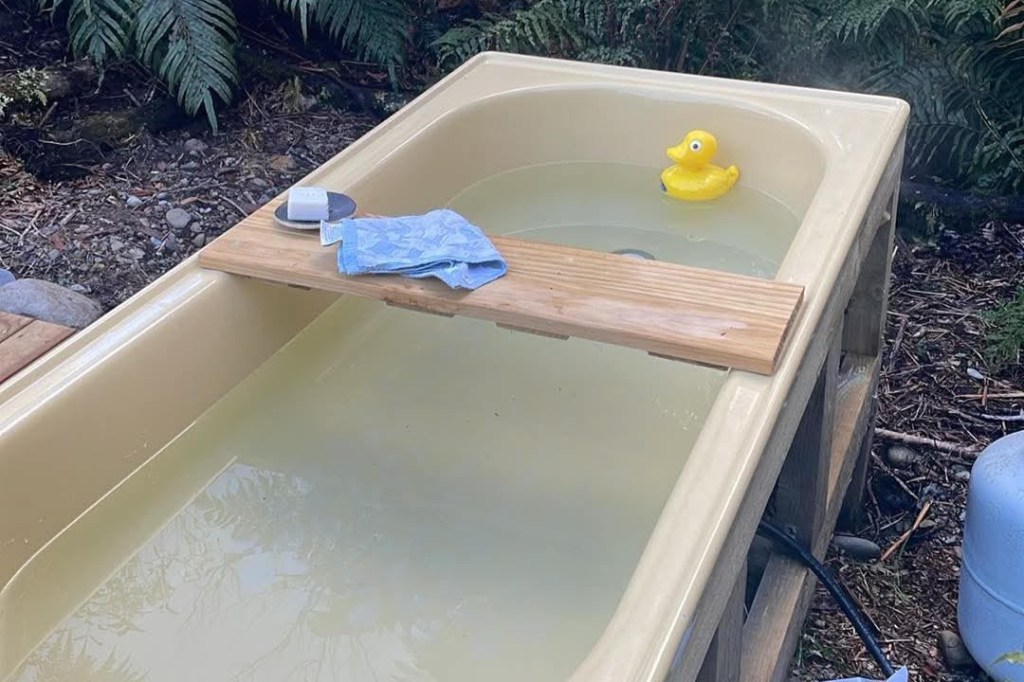
    Finally, we have a bath. It is absolute bliss sliding into the warm water at the end of the day. Relaxing back and gazing up at the blue sky framed by Rimu trees towering overhead. The ferns are close enough to touch and the birds, fantails and tom tits, fly playfully amongst the bush. This is another unique experience this beautiful place has to offer. Next, we will stain the timber deck and cladding around the bath. One day we want to upgrade to something a little fancier but for now this works perfectly.

  • Smoke & manuka: Our fire pit feasts

    “The smell of wood smoke… the taste of food that has been cooked over a fire… these things are embedded in our DNA. They take us back to a time when we sat around a fire and told stories, and looked at the stars.”
    — Mark Hix, Chef

    Being outdoors, slow cooking over a fire, sitting under the stars. Another pleasure of simple living in the bush.

    The clearing around the Shut is sheltered by tall trees and dense native bush creating a sanctuary where the air is still and quiet. A perfect spot to sit in front of the fire pit watching the flames flicker in the receding light. It is time to rest with the setting of the sun, another reality of living off-grid, we work and rest in unison with the sun and the moon.

    We have finished work for the day. I rest my wool covered toes on the edge of the fire pit inviting the heat closer. We often sit here at the end of the day, rugged up against the cold at a time of year we would never venture outside to relax when at home. As the fire burns and we wait for the hot coals to gather we listen to an audio book together, or discuss the day’s work and plan tomorrow. We share ideas, spin yarns, disagree, relent, and compromise. Most importantly, we relax, have a laugh and feel grateful. We are adventurers, living in the bush.

    Fire is elemental, it is another way to connect with the earth and nature. Cooking over fire is a pleasure we enjoy when being on the land.

    For entree we cook bread over the fire wrapped around a manuka branch stripped of its bark. This Scandinavian tradition is a simple recipe using flour, water, yeast, oil, salt, and sugar. Patience is required, if you hold the bread too close to the fire the crust will burn and the dough remains unbaked. This bread is delicious dipped in olive oil and home made dukkah.

    Jacket potatoes cooked on hot coals are my favorite. I try to find two similar sized medium potatoes, spray them with oil, season well, and double wrap in tin foil. Depending on the size of the potato they usually take between 40-60 minutes to cook turning every ten minutes or so. The result is a crispy dark skin and creamy white inner. We add a little butter and grated cheese before consuming – yum!

    Other food we have cooked on the fire are sausages, hamburgers, corn on the cob, pumpkin, and chicken. The possibilities are endless and we continue to challenge ourselves to keep trying out new ideas.

    Cooking over fire is a sensory experience and this is translated into the food through smokiness and char that adds flavour by infusing the essence of the bush into the food. This is the antithesis of surburban convenience. It’s slower, dirtier, and requires our constant attention. But as we sit there with full bellies and the scent of woodsmoke in our hair, listening to the Weka squawk in the darkness, we’re reminded that it isn’t just how we cook our food. It is how we feed our souls.

  • Winter-proofing the Shut: How a Mini Meg changed everything

    When we started taking the idea of transforming the Shut into a comfortable sleeping and living space seriously, I begun to search the internet for off-grid heating options. We didn’t have solar power set up so the obvious solution was to install a wood burner. Afterall, we had plenty of fuel for a fire.

    There are a number of companies selling smaller fires for tiny homes but the one that stood out was Roaring Meg Fires. This is a New Zealand based business and we loved the hand crafted essence of the fires. Roaring Meg Fires is a one man (plus Milo the dog) operation, John is a steel fabricator by trade and a master craftsman who builds these beautiful fires to order. There is usually a 4-6 month lead in time, so I decided to bite the bullet and order one to have it in time to install before winter came around again. The fire we chose for our small 21 square metre Shut was the Mini Meg with a 4-5kw heat output.

    We opted for the natural steel and stove polish finish and added on the optional extras of a wood box and heat shield. The heat shield will protect the walls from getting too hot given the fire will be placed reasonably close. The wood box is practical storage for firewood in a small space, and looks great with wood stacked in it. In hindsight, the shot blast and paint finish on the fire would have been a better option in our damp climate. Rust does appear occasionally on the steel surface; however, it is fairly easy to brush off and tidy up with another coat of stove polish.

    We planned on paying a professional from the local heating retailer to install the fire. At this stage we weren’t confident two weekend DIYer’s cutting holes in the roof of a leaky building was a sensible option. Unfortunately, we were forced to abandon this plan when the local man arrived, took one look at the fire, listened to us explain what we wanted, muttered a few words, then promptly left never to be heard from again.

    On reflection, it is likely his departure related to the non-compliance of the installation which we were starting to comprehend. If I had been paying closer attention I would have realised the Mini Meg was designed to be installed in “tiny homes, boats and house buses” where a permit is not required. Short of putting wheels on the Shut and calling it a Shus (Shed-bus) we were about to break the rules, and this meant we were on our own.

    Left with no other option we spent 8 hours one Saturday in June 2024 following the instruction booklet methodically, working together productively, problem-solving respectfully, and as a result at the end of the day the Mini Meg was installed.

    Here is Mike cutting a hole through the metal roof and interior cladding for flue insertion. The ski googles are a must when cutting through steel with an angle grinder.

    That’s a nice looking flue. The rubber boot was a little tricky to slide on being an extremely tight fit. It was also difficult gluing down the short rubber flaps onto the undulating corrugated iron roof. It wasn’t the tidiest of jobs but it did the trick. In the weeks ahead we noticed a small water leak and Mike got back up on the roof to add more silicone around the boot which fixed the problem.

    We opted to not join the inner flue together before feeding it down through the outer flue casing positioned in the hole in the roof. It was deemed a health and safety risk attempting to balance a long tube of steel on top of a ladder. In hindsight, this was probably a bad decision because we did strike issues working from both ends to join the flue together in-situ. At one point it came unglued within the outer metal tube through the ceiling cavity and we were flying blind at either end trying to reattach it before the fire cement dried. While a little stressful at the time we can look back fondly and refer to this incident as ‘team-building’.

    We ended up unbolting the bottom and shifting the fire over about an inch to align it more accurately with the ceiling plate and straighten the flue. While Mike was cutting holes in the roof I had drilled four holes through a left over bathroom tile to sit the fire on. The ceiling plate came with the flue kit and the shape of the hole is dependent on the slope of the ceiling. There is a mathematical calculation to determine the exact size of the oval which was beyond me. Fortunately, John was very helpful and worked it out based on the measurements I emailed through. Allowing for the slope was also important when cutting the correct size hole through the roof. Originally we cut this to the width of the flue which didn’t allow for the pitch of the roof and we needed to go back and widen the hole to fit.

    Having this fire in the Shut has been an absolute game changer. It works brilliantly, burns the wood efficiently, and looks amazing. I would 100% recommend a Mini Meg Fire to anyone looking to heat a small space. I love the light cast from the flicker of flames in the early morning when I’m snuggled in bed under the goose down quilt. On a winter’s night we sit in front of the fire, sipping tea, hot chocolate, or a shot of ruby port, and appreciate the simple pleasures in life that bring so much joy.

  • Catching the sky: Our water harvesting journey

    We pretty much take water for granted in our everyday life. It lives at the end of the tap and we turn it on and off at will. On the West Coast water is plentiful with an average rainfall of 3000mm to 6000mm each year. The bush block we bought is covered in rain forest with a creek running along one boundary. However, we soon learnt water being plentiful and also being accessible for everyday use are two different things.

    Early on we identified three main utilities we would require to live comfortably on the land – water, power and sewerage. They all cost money to establish and we knew we needed to prioritize what infrastructure to build first. After some discussion we agreed the first utility to focus on was capturing rainwater.

    While we continued to bring our drinking water over with us we were motivated by the idea of one day (soon) being able to shower, or at least bathe, in rain water to freshen up at the end of the day. This water source would also be used for washing the dishes and general cleaning.

    The financial outlay involved buying a water tank and rain harvesting set up from the local hardware store. We bought a new water tank and the total cost was around $1000 NZD ($580 USD).

    The first decision was what size tank to buy. We were restricted by the height of the Shut, needing to ensure rainwater was able to flow down off the roof into the tank. Other factors to consider were: how much water do two people need for weekend stays, how fast would the water refill between visits, and do we need to store water for when we stay longer periods, especially over summer?

    After numerous hours of non-scientific discussion and a few cheeky reds, we opted to go reasonably big and purchased a 1800L tank that was 1380mm high and 1330mm wide. I was motivated to buy a larger tank to accommodate guilt-free time relaxing in a bath star-gazing after a day of working on the land. The last thing I wanted was the water police going into rationing mode if the weather forecast looked good. The colour was also a hot topic of conversation as it had to match, hence the forest green hue chosen. Not a difficult decision.

    Mike boxed up a foundation and we he gave the roof a scrub down. Then we rolled the tank into place, and hooked up the rain harvesting pipes. These included a catcher at the top with a filter and a reasonably long first flush to stop any debris from the roof flowing into the tank at the start of each rainfall. A tap was also glued into the outlet at the bottom.

    We left the Shut and headed home hopeful that when we returned in a couple of weeks time there would be water waiting for us.

    Imagine our joy when we returned to find the tank full to overflowing. Success!

    Since harvesting rainwater we have never had an issue running out of water. In fact, we barely make a dent in this supply on our three day visits.

    This one project gave us an immense sense of satisfaction; we were on our way to creating a sustainable lifestyle. In hindsight the tank was probably bigger than we needed based on the water usage of two people visiting for two to three nights once a month, and the generous rainfall. I imagine when we stay here for longer periods it will be useful to have the excess water storage. Besides, we are future proofing. Hopefully, one day we will be spending longer periods of time on the land and will need more water. Plus, I am committed to installing a wood fired bath at some stage and will make good use of this abundant and renewable resource.

    Next, on the water agenda is setting up a shower. However, we are going to park this job for a while because winter is just around the corner. If we want to visit over the winter months we need some way of keeping warm. The Shut is constructed of 40mm metal poly panels that I swear were designed to conduct the cold. It will be too chilly to sleep in the Shut over winter without heating, and when living off-grid the most efficient approach to heating is with fire.

  • How motel stays forced us to see the shut’s potential

    At around $250 per night a Beachfront Motel room in Hokitika was a luxury we couldn’t afford to repeat too often. On top of this was the added cost of petrol driving too and from the land and our hospitality expenses staying in Hokitika with its abundance of good restaurants, pubs and cafes.

    The realisation dawned on us fairly quickly that if we wanted to stay on the land and live the ‘cabin in the bush’ dream then our best option was to stay in the Shut. It didn’t look any more inviting with all the furniture removed but it smelt better, less musty, and we felt confident it was a little more water tight with the recent improvements.

    The first job was to clean the walls and roof as best we could. Unfortunately, this didn’t appear to make a huge difference. It remained an ugly space but it was a roof over our heads. We couldn’t afford to buy any other structure to put on the land so we had to make do with what we had.

    Accepting the Shut as our new home on the land required a shift in mindset. We had to let go of our conditioned way of thinking. The need for things to look a certain way and meet a particular standard. Pragmatically, we realised at the end of the day the aesthetics of the Shut did not impact its functionality as a shelter.

    After the clean up we decided the next thing required was a bed, somewhere to sleep. Husband Mike bought some timber and made up a queen sized bed frame in the garage at home before dismantling it into kitset form to be reassembled in the Shut. We purchased an Emma mattress online that came packaged in a box and was easy to transport in the back of our Subaru Outback along with the timber framing.

    Once the bed was assembled, we added an old rimu table that had sat in the garage for years and a couple of chairs we were gifted by our daughter. The Shut was starting to feel a little more homely. However, this was just the start of its metamorphosis, there was a long way to go.

    There were no services to the land. It was completely off-grid. Although, we did have cell phone reception which was a bonus. If you are wondering about sewerage, at this stage we bought ourselves a bucket toilet from the camping shop and found a saw mill down the road that was happy to give away free sawdust.

    We transported our drinking water over in recycled plastic bottles. We had no water source for washing other than the creek, it was beautifully clear but the tannins from organic matter upstream stained the water a rusty brown. It was fine to dip in for a quick wash but we weren’t going to drink it without further testing.

    This was living at its most basic. A new experience for us forgoing the comforts we had become accustomed too in modern day life. It was somehow liberating, living the life of our pioneering ancestors. Creating something new from nothing. From here on it felt like every improvement we made, or piece of infrastructure we installed, was a ‘game changer’. This journey was hugely satisfying.

    Our decision making was always premised on answering the following two questions: what will make the biggest difference next and can we afford it?

  • The $0 cabin: When free becomes priceless

    The metal prefab building stuck out like a sore thumb. It sat unloved in the little clearing sheltered by Rimu trees and laced with rain. Stepping inside it felt dank, cold and derelict. The harsh metal walls were scuffed and dirty, the drab stained plywood floor felt springy underfoot and I noticed dark organic patterns emerging from the corners where rain had seeped inside.

    We didn’t attach any value to the little 21 square metre (226 square foot) building in our negotiation to purchase the land. If anything, we viewed it as a liability, something we would need to remove and dispose of along with the mildewy couch, sunken bed, rickety table and old chair currently housed within its walls.

    In the midst of the private sale negotiation our lawyer pointed out that final consent for the building had not been signed off. This didn’t overly concern us as we had no intention of keeping the building on the land. However, we did see this situation as an opportunity to negotiate a price reduction with the sellers. The deal was, we would not ask them to do the work to get the building consent signed off for a $10,000 discount to the agreed price.

    We were pleased with the idea of getting a discounted price knowing we were already offering well over the current rateable value of the land. But, to our surprise the sellers did not take up this offer and instead hired a builder who did the necessary work required to meet the lawyer’s request. This work included building the steps up to the sliding door, putting up spouting, attaching the downpipes, and adding the timber to the bottom of the building covering the foundation.

    While this did improve the look of the cabin slightly, we still weren’t convinced we would ever stay the night in this unlikely shelter.

    By now we had started calling this building the ‘Shut’. Naming it the Shut originated from my refusal to call it a cabin. To be honest, I didn’t want to contaminate my dream of owning a ‘cabin in the woods’ by associating it with this building. That is why I started thinking of the building as a shed, or a hut, confusing myself one too many times and hearing myself say ‘shut’ instead.

    This is how the building we didn’t want became known as The Shut, a name that has stuck.

    This is the back story of The Shut, and I’ll let you into a secret, there is more story to come. I have set the scene in this post and will continue to write about The Shut’s evolution over the last two years and into the future as we continue to live the dream.

    “The world is full of obvious things which nobody by chance ever observes” – Arthur Conan Doyle

  • The land that whispered back

    “I think having land and not ruining it is the most beautiful art that anybody could ever want.” – Andy Warhol

    When we started looking for a block of land we had a few requirements on our wish list. Firstly, the land needed to be predominantly native bush. Secondly, we wanted access from the land to a water source of some description. Finally, the block needed to be within a three hour drive of our current home in North Canterbury so we could commute for weekend stays.

    After surveying a map and googling travel times we decided to focus our search on the West Coast of the South Island around the Hokitika area. The drive across the Southern Alps from the East coast of New Zealand to the West Coast through Arthurs Pass and across the Otira Gorge viaduct is one of the most scenic drives in New Zealand, if not the world.

    This is the road we travel now to get from here to there and back again as we divide our time between home and this land. State Highway 7. I love the feeling of heading west as we drive across the Canterbury plains, along the long straight road at the foothills, the mountains beckoning us forward. At the moment, we are in the thick of winter when the mountains shimmer under the midday sun illuminating the surrounding hills and valleys. We often stop in Arthurs Pass, two hours into the drive for a coffee, mouth-wateringly good hot cheese roll and a side of banana cake. Simple pleasures, a treat for the taste buds, fuel for the journey. We are almost there.

    In May 2023 we travelled this road to visit a block of land that was advertised for sale on Trademe. 6 hectares (15 acres) of regenerating native bush in the Arahura Valley around 2 hours and 50 minutes drive from North Canterbury across the Southern Alps to the West Coast of New Zealand. It was a private sale. The owners were asking for around $400,000 NZD ($240,000 USD). After owning the property for 22 years and with a relationship separation in the distant past they had decided to let go of past dreams and move on with their lives.

    The land is separated by Fox Creek from government owned conservation land (Crown land) to the northwest, bordered on the south edge by farmland and a road to the east. The land which had belonged to the Crown prior to private ownership had been logged at some point in the past before logging native timber on the West Coast was banned in 2002. The podocarp native forest growing had now been regenerating for at least 50 years and was fast establishing itself on the land.

    What we stumbled across that day was a little piece of paradise. The owner had recently cut a track along the edge of the creek through the King’s Chain. The ‘King’s Chain’ (or Queen’s Chain depending on who is sitting on the commonwealth throne) is a historic New Zealand promise: a public strip of land, at least 20 meters wide, reserved along rivers, lakes, and coasts. It means that while this beautiful regenerating bush is in private ownership, the strip beside our creek remains a public right of way – a pathway for anyone to walk, fish, or simply connect with the water’s edge, forever. While this is the intention in theory these strips of land are often inaccessible to the public.

    When talking about land ownership and property rights in Aotearoa New Zealand I acknowledge the rights of Māori, the tangata whenua (indigenous people of the land) to this place, both the land and waterways. The local Iwi (tribe) Ngāti Waewae are the true kaitiaki (guardians) of this land.

    On arrival to view the land for the first time we were ill-prepared to navigate the rain soaked, muddy track not thinking to bring gumboots so we missed seeing the full beauty of the land and its distinct West Coast character. The kahikatea, rimu, tōtora and punga trees cloaking a variety of ferns and mosses bordering the creek.

    However, we saw enough. We were soothed by the rush of water cascading over rocks as it wound downstream, marveled at the feel of spongy damp moss springing back under our fingertips, watched the sunlight dance across the ground under the forest canopy, tasted the peat in the air, and smelt the musky, earthy scent of rainforest.

    I recognized this land from my dreams. We knew this was our piece of paradise. Now, it was time to negotiate.